Hi!
It's
Bellaidea today with a new challenge,
OUR ROOTS.
Knowing we have participants from all over the world we can not wait to see your projects.
This time our Mood Board should just inspired you to use some interesting elements specific to your country.
Folk art, costumes, national decorations, anything like this and please
don't forget to tell us about it!
I had several ideas what will I do for this challenge but since it's April and Easter coming I used the idea about very nice Polish tradition of painting /decorating eggs.
"There are many schools and techniques – some people paint them, others scratch or paste patterns on their surface, others still dye them in special extracts. But one thing has not changed for centuries – the tradition of decorating Easter eggs is alive and well all across Poland.
Easter eggs in Poland are commonly known as pisanki. These are usually chicken eggs covered with intricate decorations to look nice on Polish tables and in Polish homes during Easter. The name pisanki derives from the verb pisać which used to mean “draw” or “engrave patterns” (compare with Latin pictura). The first pisanki found by archaeologists in Poland date as far back as the 10th century. Today, all decorated Easter eggs are called by this name, but there are different terms for the individual artistic techniques of making them.
Pisanki are created by drawing designs on egg shells with molten wax. Then, the eggs are dyed and the wax is removed, leaving a pattern on the surface. Lambs, crosses, flowers and other springtime motifs are the most popular symbols depicted on pisanki.
Kraszanki, also known as malowanki, are single-colour dyed eggs. To make the shells yellow and orange, you need to boil eggs in water with onion peels; brown hue will result from adding some oak bark; while dark hollyhock flower will give yourkraszanki a beautiful violet colour. Extracts of young rye, barley, grass or mistletoe leaves will dye your eggs green, and to get black colour use some alder bark. Eggs soaked in cornflower decoction will turn blue, in coffee – brown, in beetroot extract – dark red. In addition, there are plenty of chemical dyes available today.
Dyed eggs are traditionally covered with decorations, e.g. drawings made with a sharpened pin. Pisanki created this way are called skrobanki or drapanki. Eggs decorated with flower petals, pieces of cloth or paper cuttings are oklejanki andnalepianki, while those with their contents removed and shells painted are known as ażurki.
The Rev. Krzysztof Kluka Museum of Agriculture in Ciechanowiec (Podlasie region) houses Poland’s biggest collection of Easter eggs: close to two thousand pisanki from Poland and across the world. Apart from chicken or goose eggs, the Museum boasts artefacts made from penguin and seagull eggs, as well as minute hummingbird and giant ostrich eggs. The museum collection is based on over a thousand exhibits donated by Irena Stasiewicz-Jasiukowa and Jerzy Jasiuk from Warsaw, who spent thirty years collecting and cataloguing Easter eggs from across the country.
Monika Kucia"
The was a time in my life I was very busy with ostrich eggs too :).
For my page I used eggs
chipboards and
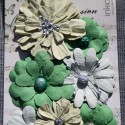
flowers from friendly company from Poland, Wycinanka. Very Polish accent!
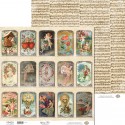
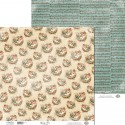
Beautiful memories collection and
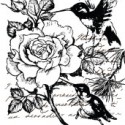
stamps from Inkido were used to create my page.
Challenge Rules:
1. You are allowed to make a card , layout or
altered/off the page project as long as you follow the
challenge specifications.
2. Projects must be linked up via our Linky .
3. You may submit as many entries as you like for
this challenge and combine your entry with up to 2
other challenges.
4. It is required that you mention in your blog post
that you are playing along at Inkido TOGETHER with
a link back to our blog and you post our Mood Board in your post too.
5. All entries must be received by the end of April 2014.
6. If you are using Papercraft Scandinavia / Inkido
product please let us know what is it.
7. Have fun!!
We have a
fun prize for this challenge, all new stuff from our shop!


